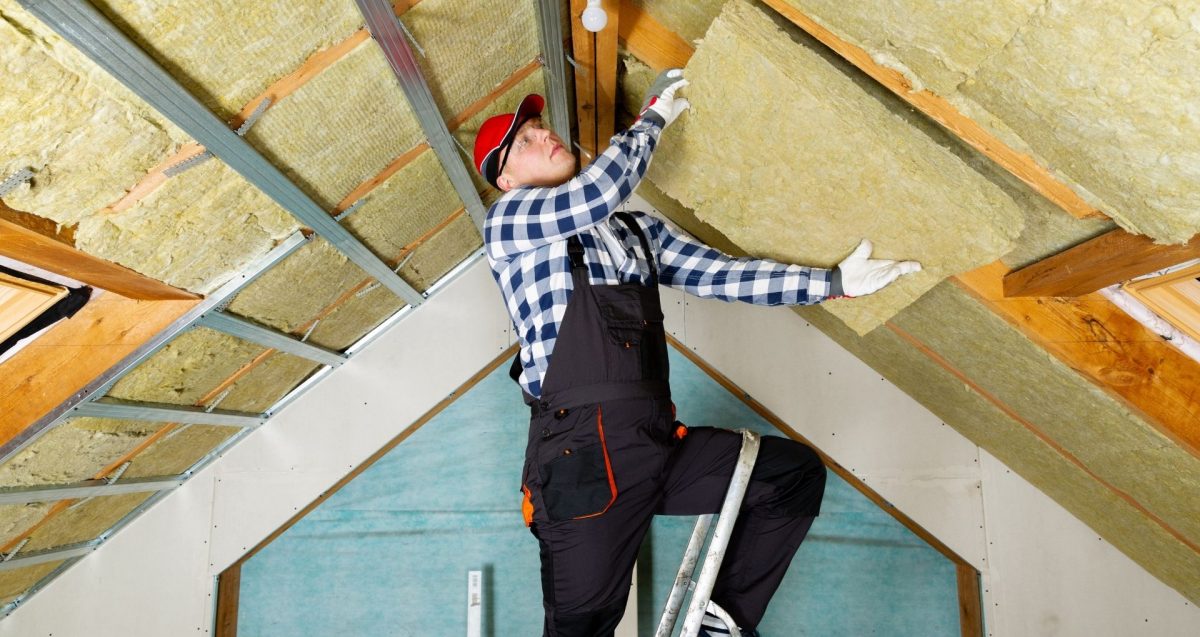
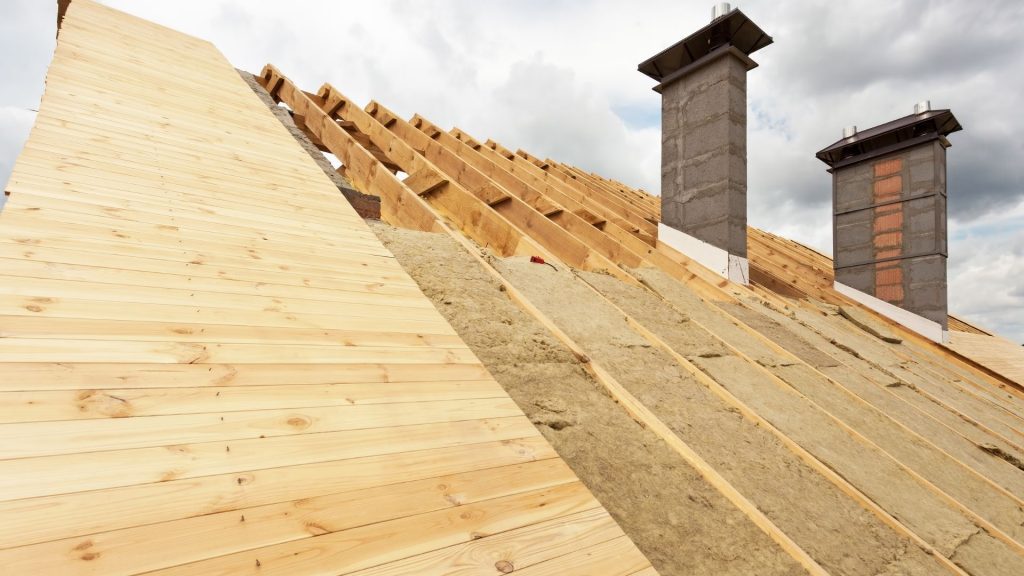
Installing insulated roof panels requires careful planning, proper preparation, and attention to detail. Here is a general guideline for installing insulated roof panels:
Safety Precautions: Begin by ensuring a safe work environment. Use appropriate personal protective equipment (PPE) such as gloves, safety glasses, and fall protection gear if working at heights.
Roof Preparation: Inspect the roof structure to ensure it is structurally sound and able to support the weight of the insulated panels. Repair any damaged areas, and ensure proper roof slope and drainage.
Measurement and Cutting: Measure the dimensions of the roof area and the required size of the insulated roof panels. Use a suitable cutting tool to trim panels as needed, ensuring accurate sizing and clean edges.
Vapor Barrier Installation: If necessary, install a vapor barrier or moisture barrier over the roof substrate. This layer helps prevent moisture from entering the roof system and protects the insulation from damage.
Panel Placement: Begin installing the insulated roof panels from one end of the roof. Align the panels properly and ensure they are perpendicular to the roof slope. Use appropriate fasteners recommended by the manufacturer to secure the panels to the roof structure.
Panel Connections: Ensure a proper overlap between adjacent panels to create a seamless and weather-tight connection. Secure the panels together using recommended fasteners or clips provided by the manufacturer.
Flashing and Sealing: Install appropriate flashing materials around roof penetrations such as vents, chimneys, or skylights. Use sealants or tapes specifically designed for roofing applications to seal joints, connections, and gaps, ensuring a watertight seal.
Insulation Alignment: If the insulated roof panels have an insulation core, ensure the insulation is aligned correctly within the panels, providing consistent thermal performance across the roof.
Finishing and Trim: Install any necessary edge trims, fascia boards, or other finishing elements to provide a neat and professional appearance. Follow manufacturer guidelines for specific finishing details.
Final Inspection: Conduct a thorough inspection of the installed roof panels to ensure they are properly secured, sealed, and aligned. Check for any signs of damage or areas that may require further attention.
It is crucial to follow the installation guidelines and recommendations provided by the manufacturer of the specific insulated roof panels being used. These instructions will provide specific details and considerations for the particular product and ensure a successful installation. If needed, consult with a professional contractor or roofing expert to ensure proper installation techniques and best practices are followed.
Table of Contents
ToggleHow do you seal insulated roof panels?
Sealing insulated roof panels is an important step in ensuring their performance and maintaining a watertight roof system. Here’s a general guideline for sealing insulated roof panels:
Surface Preparation: Ensure the surfaces of the insulated roof panels are clean, dry, and free from dust, debris, or any contaminants that may hinder proper adhesion of sealants.
Select Suitable Sealants: Choose a sealant that is compatible with the materials of the insulated roof panels and the specific conditions of the roof. Silicone, polyurethane, or butyl rubber-based sealants are commonly used for sealing roof panels.
Joint Preparation: Inspect the joints between the roof panels for any gaps or openings that need to be sealed. Clean and remove any loose materials or debris from the joint area.
Apply Primer (if required): Some sealants may require a primer to enhance adhesion. If recommended by the sealant manufacturer, apply the primer according to the instructions provided. Allow sufficient drying time before proceeding.
Sealant Application: Using a caulking gun or suitable application tool, apply a continuous bead of sealant along the joint or gap between the roof panels. Ensure the sealant fully fills the gap without excess or voids.
Tooling and Smoothing: Immediately after applying the sealant, use a suitable tool, such as a putty knife or a caulk smoothing tool, to tool and smooth the sealant. This helps create a uniform seal and ensures proper adhesion.
Overlapping Panels: Pay special attention to the joints where the roof panels overlap. Apply sealant along the overlapping edges to create a weatherproof seal and prevent water infiltration.
Roof Penetrations and Flashings: Seal any roof penetrations, such as vents or chimneys, with appropriate flashing materials and sealants designed for these applications. Ensure a proper seal around these areas to prevent water leakage.
Allow Curing Time: Follow the manufacturer’s instructions regarding the curing time for the sealant. Avoid exposing the sealed joints to moisture or heavy rainfall during this curing period.
Inspection: Once the sealant has fully cured, inspect the sealed joints for any gaps, cracks, or areas that may require touch-ups. Make any necessary repairs or additions to ensure a complete and effective seal.
It is important to consult the sealant manufacturer’s instructions and follow their recommendations for proper application, curing time, and any specific considerations for the sealant being used. Additionally, consulting with a professional contractor or roofing expert can provide further guidance and ensure proper sealing techniques are followed for the specific insulated roof panels being installed.

What thickness are insulated roof panels?
Insulated roof panels are available in a range of thicknesses, depending on the specific requirements of the project and the desired level of insulation. The thickness of insulated roof panels can vary between different manufacturers and product lines. Common thicknesses for insulated roof panels typically range from 1 inch (25 mm) to 6 inches (150 mm) or more.
The selection of the appropriate thickness depends on factors such as the desired insulation value (R-value or U-value), local climate conditions, energy efficiency goals, and building code requirements. Thicker insulated roof panels generally offer higher insulation values and improved thermal performance.
When determining the appropriate thickness for insulated roof panels, it’s important to consider the following:
Building Codes and Regulations: Local building codes and energy efficiency regulations may specify minimum insulation requirements. Check the applicable codes to ensure compliance.
Climate Considerations: The local climate and weather conditions play a role in determining the required insulation thickness. Colder climates typically require higher insulation values to minimize heat loss, while warmer climates may prioritize reducing heat gain.
Energy Efficiency Goals: Determine the desired energy efficiency goals for the building. Higher insulation thicknesses can contribute to better energy performance and reduced heating and cooling costs.
Structural Considerations: Consider the load-bearing capacity of the roof structure. Thicker insulation panels may have greater weight and require appropriate support from the roof framing.
Consulting with an architect, engineer, or roofing professional can help determine the ideal thickness of insulated roof panels based on specific project requirements and local building regulations. They can assess factors such as insulation needs, structural considerations, and energy efficiency goals to determine the most suitable thickness for the insulated roof panels.


